听说加了 swap 会有用。。总之试一下又不会怀孕 
参考了 Digital Ocean 官方的教程:How To Add Swap on Ubuntu 14.04
Linux 中 Swap(交换分区),类似于Windows的虚拟内存,就是当内存不足的时候,把一部分硬盘空间虚拟成内存使用,从而解决内存容量不足的情况,和Windows的虚拟内存(pagefile.sys)的作用是一样的。
1.查看操作系统中是否已经有交换分区
使用 sudo swapon -s 或者 free -m
total used free shared buffers cached
Mem: 3953 154 3799 0 8 83 -/+
buffers/cache: 62 3890
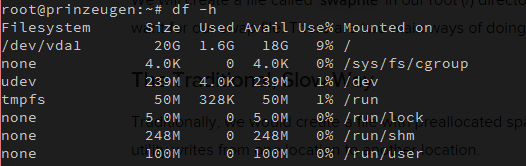
Swap: 0 0 02.检查硬盘使用情况
df -h
3.创建 swap 文件
有两种方法:
The Traditional, Slow Way
Traditionally, we would create a file with preallocated space by using the dd command. This versatile disk utility writes from one location to another location.
We can use this to write zeros to the file from a special device in Linux systems located at /dev/zero that just spits out as many zeros as requested.
We specify the file size by using a combination of bs for block size and count for the number of blocks. What we assign to each parameter is almost entirely arbitrary. What matters is what the product of multiplying them turns out to be.
For instance, in our example, we’re looking to create a 4 Gigabyte file. We can do this by specifying a block size of 1 Gigabyte and a count of 4:
$ sudo dd if=/dev/zero of=/swapfile bs=1G count=4

4+0 records in
4+0 records out
4294967296 bytes (4.3 GB) copied, 18.6227 s, 231 MB/s
Check your command before pressing ENTER because this has the potential to destroy data if you point the of (which stands for output file) to the wrong location.
We can see that 4 Gigabytes have been allocated by typing:
$ ls -lh /swapfile

-rw-r--r-- 1 root root 4.0G Apr 28 17:15 /swapfile
If you’ve completed the command above, you may notice that it took quite a while. In fact, you can see in the output that it took my system 18 seconds to create the file. That is because it has to write 4 Gigabytes of zeros to the disk.
If you want to learn how to create the file faster, remove the file and follow along below:
sudo rm /swapfile
The Faster Way (推荐)
fallocate -l 2G /swapfile 创建一个 2G 的 swap 文件
这时候用 ls -lh /swapfile 可以查看已创建的 swap files

4.启用创建的 swap 文件
设置权限 chmod 600 /swapfile 使之更安全
使用 ls -lh /swapfile 验证权限配置是否生效

告诉系统将此文件做为 swap 空间使用 mkswap /swapfile
启用~ swapon /swapfile
可以使用 swapon -s 验证是否生效 
现在可以再用 free -m< 看看了

5.持久性地启用你的 swap file
现在虽然启用了,但是每次重启后,系统是不会帮我们自动启用 swap file 的
可以通过修改 fstab 文件 vim /etc/fstab 在文件底部加入这样一行
/swapfile none swap sw 0 0实现每次启动自动启用 swap file ~
6.微调你的 swap 配置 (懒得翻译了。。趴 (つд⊂)
注意,下面的文章出现了一些奇异的排版错误,crayon 的锅(逃
There are a few options that you can configure that will have an impact on your system’s performance when dealing with swap.
The swappiness parameter configures how often your system swaps data out of RAM to the swap space. This is a value between 0 and 100 that represents a percentage.
With values close to zero, the kernel will not swap data to the disk unless absolutely necessary. Remember, interactions with the swap file are “expensive” in that they take a lot longer than interactions with RAM and they can cause a significant reduction in performance. Telling the system not to rely on the swap much will generally make your system faster.
Values that are closer to 100 will try to put more data into swap in an effort to keep more RAM space free. Depending on your applications’ memory profile or what you are using your server for, this might be better in some cases.
We can see the current swappiness value by typing:
$ cat /proc/sys/vm/swappiness

60
For a Desktop, a swappiness setting of 60 is not a bad value. For a VPS system, we’d probably want to move it closer to 0.
We can set the swappiness to a different value by using the sysctl command.
For instance, to set the swappiness to 10, we could type:
$ sudo sysctl vm.swappiness=10

vm.swappiness = 10
This setting will persist until the next reboot. We can set this value automatically at restart by adding the line to our /etc/sysctl.conf file:
$ sudo nano /etc/sysctl.confAt the bottom, you can add:
vm.swappiness=10Save and close the file when you are finished.
Another related value that you might want to modify is the vfs_cache_pressure. This setting configures how much the system will choose to cache inode and dentry information over other data.
Basically, this is access data about the filesystem. This is generally very costly to look up and very frequently requested, so it’s an excellent thing for your system to cache. You can see the current value by querying the proc filesystem again:
$ cat /proc/sys/vm/vfs_cache_pressure

100
As it is currently configured, our system removes inode information from the cache too quickly. We can set this to a more conservative setting like 50 by typing:
$ sudo sysctl vm.vfs_cache_pressure=50

vm.vfs_cache_pressure = 50
Again, this is only valid for our current session. We can change that by adding it to our configuration file like we did with our swappiness setting:
$ sudo nano /etc/sysctl.confAt the bottom, add the line that specifies your new value:
vm.vfs_cache_pressure = 50Save and close the file when you are finished.
7.总结
如果你总是碰到 OOM (Out of Memory) 错误,或者你的系统无法运行你需要的应用的话,最好的选择是优化你的应用配置或者升级你的配置。。调整 swap 配置然并卵